After over a year of work, lots of itchy fiberglass, many discussions, and one night of frenzied work we have finally closed the wing on the aircraft!
Closing the wing? Let me explain.
The wing of the Glasair is one solid piece from wingtip to wingtip. As Glasair ships the wing it comes with the entire bottom skin bonded to the main spar. The top skin comes separately and is cut in half at the aircraft centerline. The builder then adds the ribs, rigs the control system, adds all the system components, and in our case the flap attachment hinges before bonding the top skin and sealing everything.
The first month was spent building the wing jig and leveling the wing in the jig. Adding the ribs took about 7 months to do due to the large number of reinforcement plies that had to be added to each rib. Manufacturing and rigging the control system took about 3 months. The last two months were spent adding the various systems that had to be added and installing the flap hinges. Some of these systems were:
- Conduits to run wires and pressure hoses through
- Wing fuel tank level probes
- Roll autopilot servo
- Pitot / AOA probe
- Wiring for fuel probes, wingtip lights, autopilot, and pitot heat
- Hoses for pitot & AOA pressure sending
We spent a lot of time creating an interference-free autopilot servo mount. We also spent a lot of time refining the access panel around the pitot/AOA probe to make things easily accessible for maintenance when the wing is closed.To this end we put all the connectors close to the access panel and the pressure lines in a way that they could be removed and inspected but were still protected against vibration.
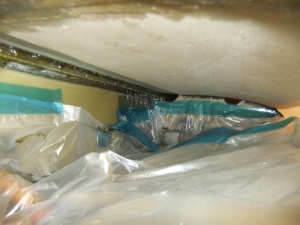
All this work brought us to the wing closure. Work began the day before close.We sanded all of the surfaces that required bonding. We washed the wing three times try and remove as much contamination as absolutely possible from the fuel tank area and the generally inaccessible wing interior. We then added plastic bags to the inside of the wing in areas that we could reach after closing to catch as much of the resin overflow as possible.
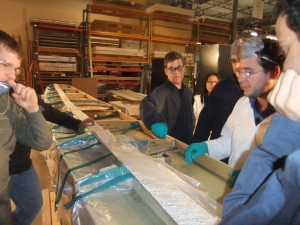
Working an issue with the pressure line mount before close. Notice the plastic covering the wing surfaces all throughout the wing.
Closing involves laying resin and mil fiber throughout the main spar and mill fiber on all of the ribs. The difficult part is that we had a 23 minute time limit to complete this operation for each wing half due to the fact that the wing skin needed to be bonded before the resin began to gel, which took 25 minutes from activation. Thankfully we have a large team so a distribution of tasks was important. A couple of people would mix all of the resin and mill fiber that we needed while another couple of people would concentrate on laying the mixture down on the spar. Another couple of people would focus on laying the mill fiber on the ribs.

Resin-mixing station. Each one of the white plastic cups contained 100 grams of resin or mill fiber.
The Glasair instructions call for 650 grams of resin on the main spar and 350 grams of mill fiber on the ribs and main spar. As soon as we began we realized that 650 grams was a LOT of resin to put on the main spar but hey, those were the directions, so we pressed on.
About 16 minutes after resin activation we realized that we had a problem…we were going to need more mill fiber…a lot more. And since when it rains, it pours, the pump that we were using to measure our resin was malfunctioning and so it was pumping very slowly. The resin-making team frantically managed to mix another 200 grams of mill fiber by the time the clock hit 20 minutes and those were laid on the wing as fast as possible to close the wing before the clock reached 23 minutes.
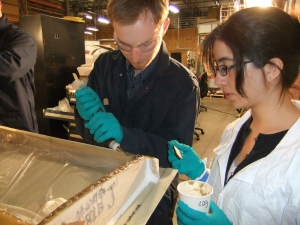
Chris and Maria laying fown mill fiber as fast as possible. The cake-frosting applicators came in very handy!
With barely seconds to spare we carefully laid the top skin on and put about 200 lbs of sandbags on top to weigh things down and ensure a good bond. Boy what a stressful 23 minutes!
At that point we all talked for a few minutes and discussed changes we needed to make for the bonding of the other wing half. We then took a peek to inspect our handiwork and make sure that things had bonded properly. Part of the criticality of this operation is that the Glasair has integral leading-edge fuel tanks. This means that if the spar did not bond to the top skin perfectly we are going to have fuel tank leaks that we are going to have to chase down and repair (but the team is confident we did a good job!)
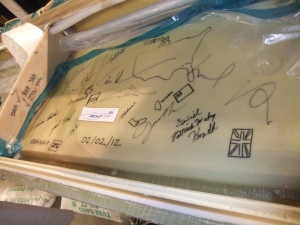
With the lessons we had learned after closing the first wing half the second one went much more smoothly. We made more mill fiber (although we think it could’ve used a little more) and split the tasks more efficiently. We were done with a minute or two to spare in which we made a few touch-ups and the second skin came on the wing. We were commenting that in the instructions Glasair calls for having 3 people to close the wing. We had seven and we almost didn’t make it! Lesson: bring some friends! One last thing, before we closed the right skin we all signed the wing skin in an inaccessible area after closure. It will be a nice memento that nobody knows is there except us who built the machine.
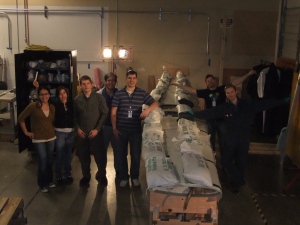

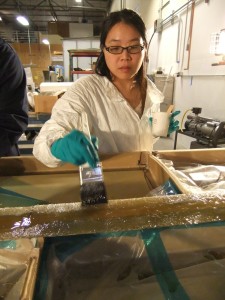



Great job team!
By: Victoria DeMatteis on Feb 3, 2012
at 8:04 am
Thank you 🙂 One step closer to a flying airplane.
By: Miguel E. Mármol G. on Feb 22, 2012
at 5:52 pm
[…] it. naturally, it seemed like a fantastic idea to me. Well, he was there during the ordeal that was the day we closed the wing and he filmed the entire thing. His presence was also very useful as he jumped in many times to […]
By: Wing Closure Time-Lapse Video « ONE BCnF on Mar 9, 2012
at 10:41 am
[…] of the key milestones. For example, you may wish to read about wiring the wing, making the ribs, closing the wing and the horizontal stabilizer, attaching the horizontal stab to the airplane, making the engine […]
By: The story of the Boeing ONE BCnF team and their Glasair | ONE BCnF on May 27, 2014
at 12:21 pm